
How to Create a Custodian in the Platform?
Introduction
In the Reluna platform, custodians play a critical role in the management and administration of financial assets. A custodian is typically a bank or financial institution that holds securities and other assets on behalf of clients, ensuring their safekeeping, settlement and reporting. Accurate and structured custodian setup is essential for enabling reliable data exchange, transaction reconciliation and compliance with regulatory standards.
This guide walks you through the end-to-end process of creating a custodian in the platform: from initiating a new record to entering essential entity details, assigning contacts and enabling future integrations.
Whether you are onboarding a new custodian for the first time or standardizing your internal data records, the custodian creation form ensures consistency across:
Legal and internal identification
Contact and relationship management
Supported services and entity classification
Manual vs. automated data handling preferences
Purpose
This guide is designed to help you:
Add a new custodian to the platform.
Understand what each input field means and how to complete it.
Enable integrations for automated data handling.
Ensure your custodian is properly configured for future operations.
Manage custodian integrations and control user access through the Connectors tab.
How to Create a Custodian
Navigate to the Custodians Tab
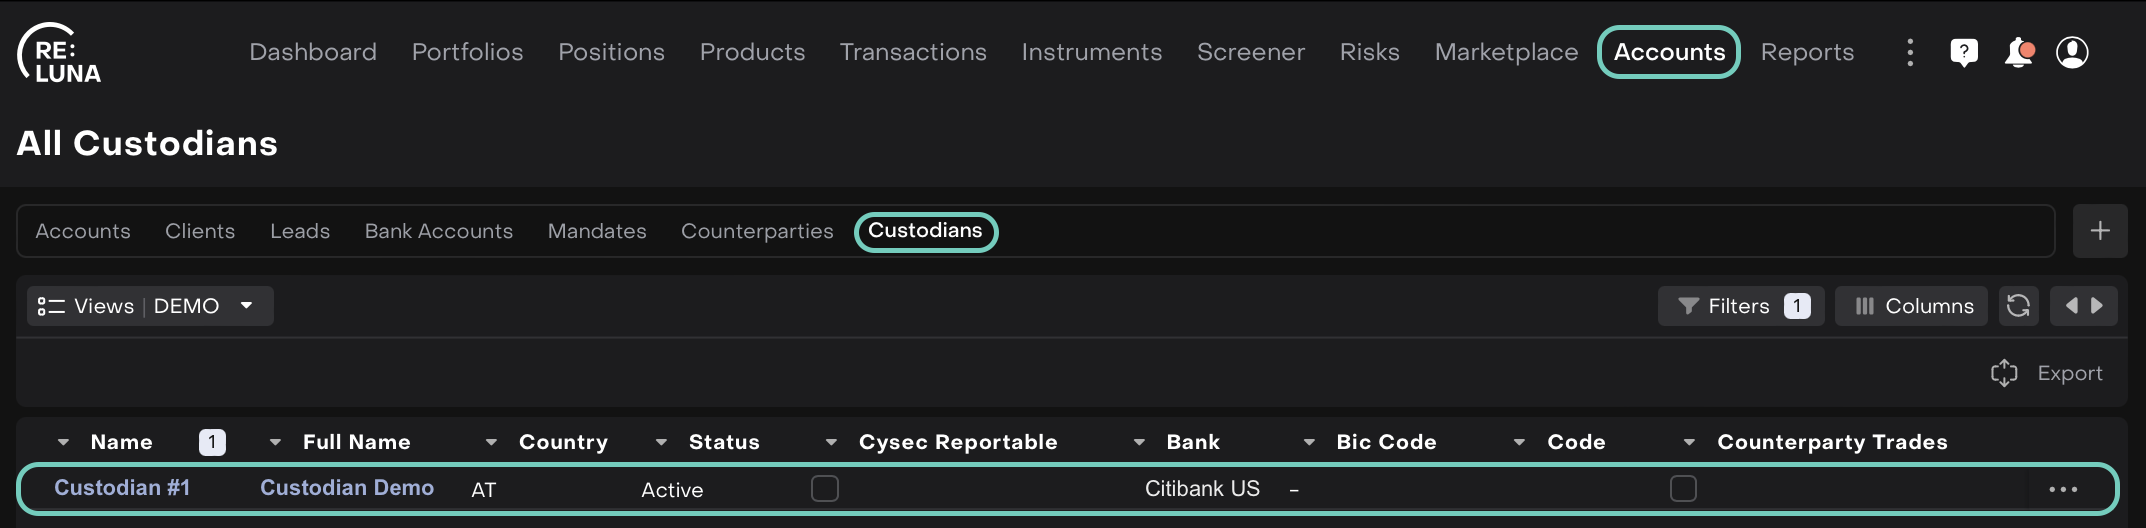
From your Dashboard, click on Accounts in the top navigation bar.
Within the Accounts section, select the Custodians tab.
On the right side of the screen, click the + icon to start adding a new custodian.

Fill Out the Custodian Details
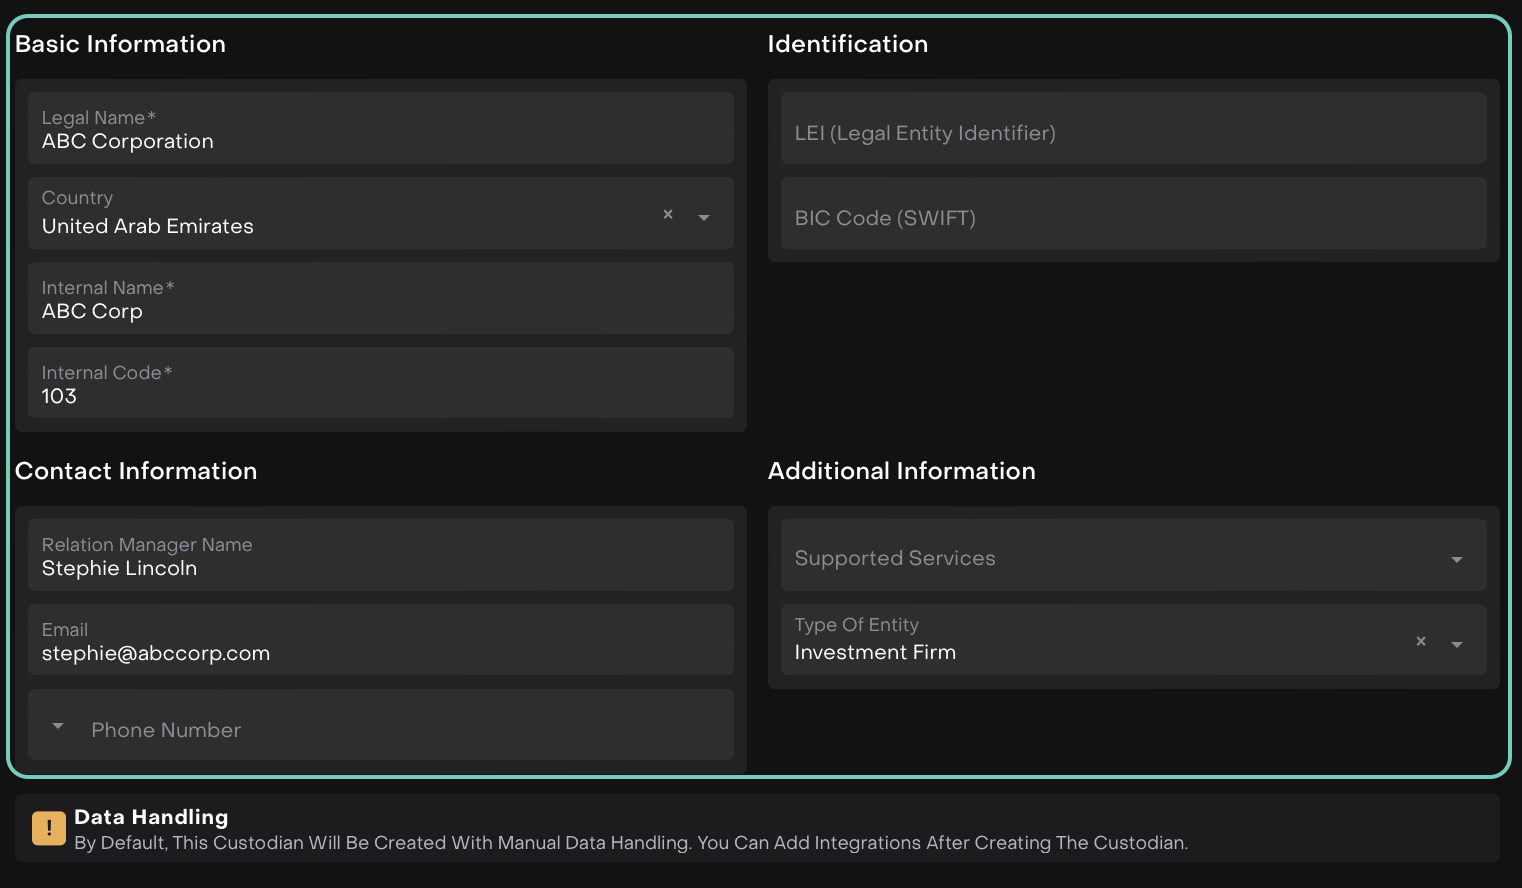
You will now see a form split into several sections. Here’s what each one means and what you should enter:
Field | Description |
|---|---|
Basic Information | |
Legal Name* | The official name of the custodian. Example: |
Country | The country where the custodian is based. Example: |
Internal Name* | A short name or label used within the platform interface and internal workflows, especially where the full legal name is not required. Example: |
Internal Code* | A unique numeric or alphanumeric identifier used by the platform for backend operations such as trading logic, integration mapping and reconciliation. Example: |
Contact Information | |
Relation Manager Name | The name of your point of contact at the custodian. Example: |
Contact email of the custodian’s representative. | |
Phone Number | Optional, but helps in direct communication. |
Identification | |
LEI | The Legal Entity Identifier is a 20-character alphanumeric code assigned to banks/institutions for identification in global transactions. Format: Combination of letters and numbers only – no special characters or symbols. |
BIC Code (SWIFT) | Used for international transactions. |
Additional Information | |
Supported Services | Select the services this custodian supports. Multiple options can be selected depending on the custodian’s role.
These selections determine how the platform handles transactions, reconciliations and integrations for the custodian. |
Type of Entity | Defines the category of the custodian based on its business or regulatory role—such as Where it is used: |
Data Handling Notice
By default, this custodian will be created with manual data handling. You can add integrations after the custodian is created.
This means you will need to manually input data unless you link an integration afterward.
Save and Edit the Custodian
Once you have filled in all the details:
Click the Save button at the bottom of the form.
After saving, you will be redirected to the created custodian’s page.
Use the Edit toggle (top-right corner) if you need to update any information later.
How to Manage Custodian Integrations via the Connectors Tab
Once a custodian is created and saved, you can configure integrations and manage user access to those integrations via the Connectors tab. This section allows you to view and control which custodians your company is connected to and who within your team can access those connections.
1. Accessing the Connectors Tab
Navigate to the Custodians section from the Accounts tab.
Click on the custodian whose connections you want to view or manage.
At the top of the custodian profile, click on the Connectors tab.
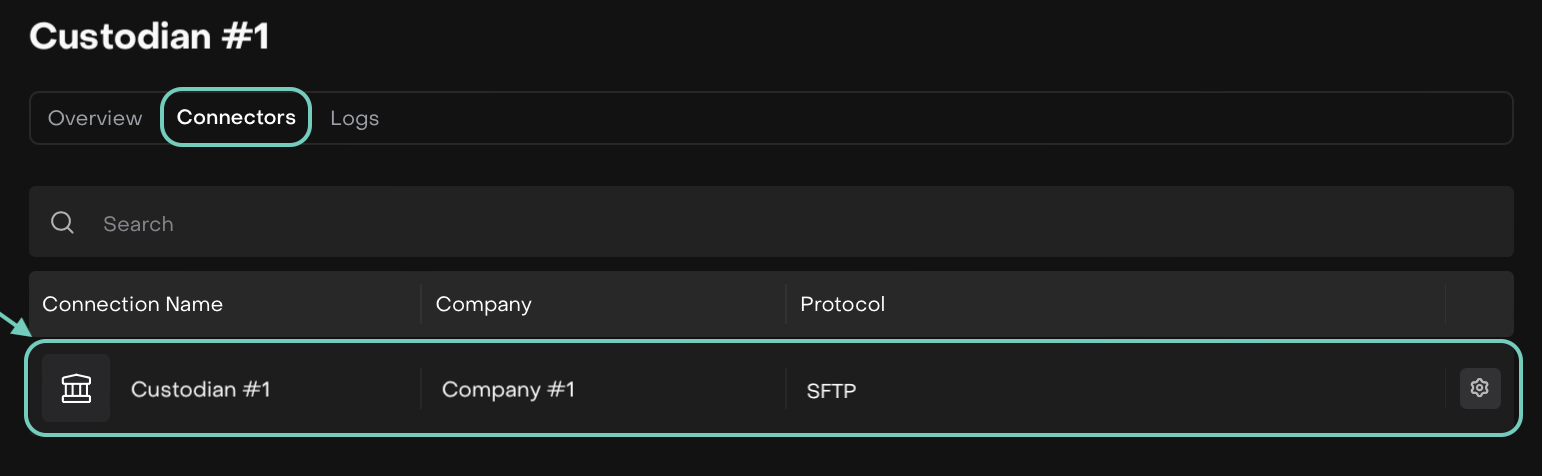
You will see a list of existing connections with the following details:
Connection Name
Linked Company
Protocol (SFTP, API or Email)
If no connections exist yet, this tab will be empty until an integration is added or initiated.
2. Viewing and Editing an Existing Connection
If a connection already exists, you will see a gear icon (⚙️) on the far right of that row — this indicates you have the necessary permissions to manage access.
Click the gear icon to open the connection's settings.
You will see:
The Company that the connection is linked to.
A toggle for Private Connection to restrict access to a defined list of users.
A Select Users panel that displays who currently has access and allows you to add or remove users.
3. Managing User Access
To control who can use the custodian connection:
Use the search bar to find and add users from the associated company.
Assign a role to each added user (e.g., CEO, Operations, Admin).
Remove users using the trash icon next to their name.
If the Private Connection toggle is ON, only the listed users will have access.
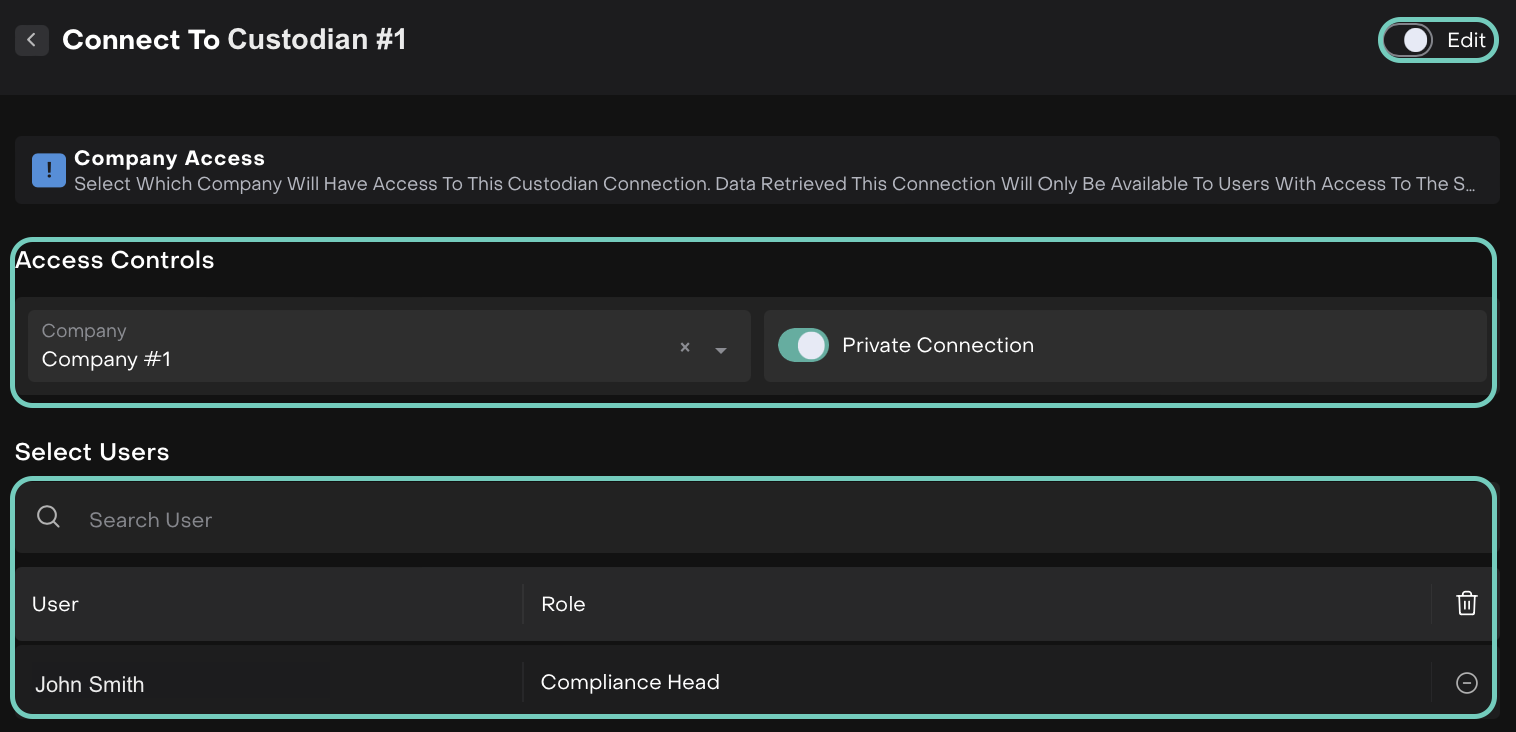
This ensures sensitive financial integrations are only accessible to authorized personnel.
4. Save Your Changes
After making the updates, click Save in the bottom right corner.
If you want to exit without saving, click Back.