Account Management
Introduction
The "Accounts" section of the Reluna Platform provides an opportunity to create accounts for both individuals and legal entities. Account keeps information about Client and the history of the relationship with the company.
To create Account it is necessary to have permissions to create, view and modify Accounts.
System provides the following types of Accounts:
Account Type | Description |
|---|---|
Individual | Individual Client |
Entity | Legal entity |
Company Account | Legal Entity (company account itself), can be created to create PROP or OMNIBUS portfolio |
Account creation workflow
How to create Individual Account
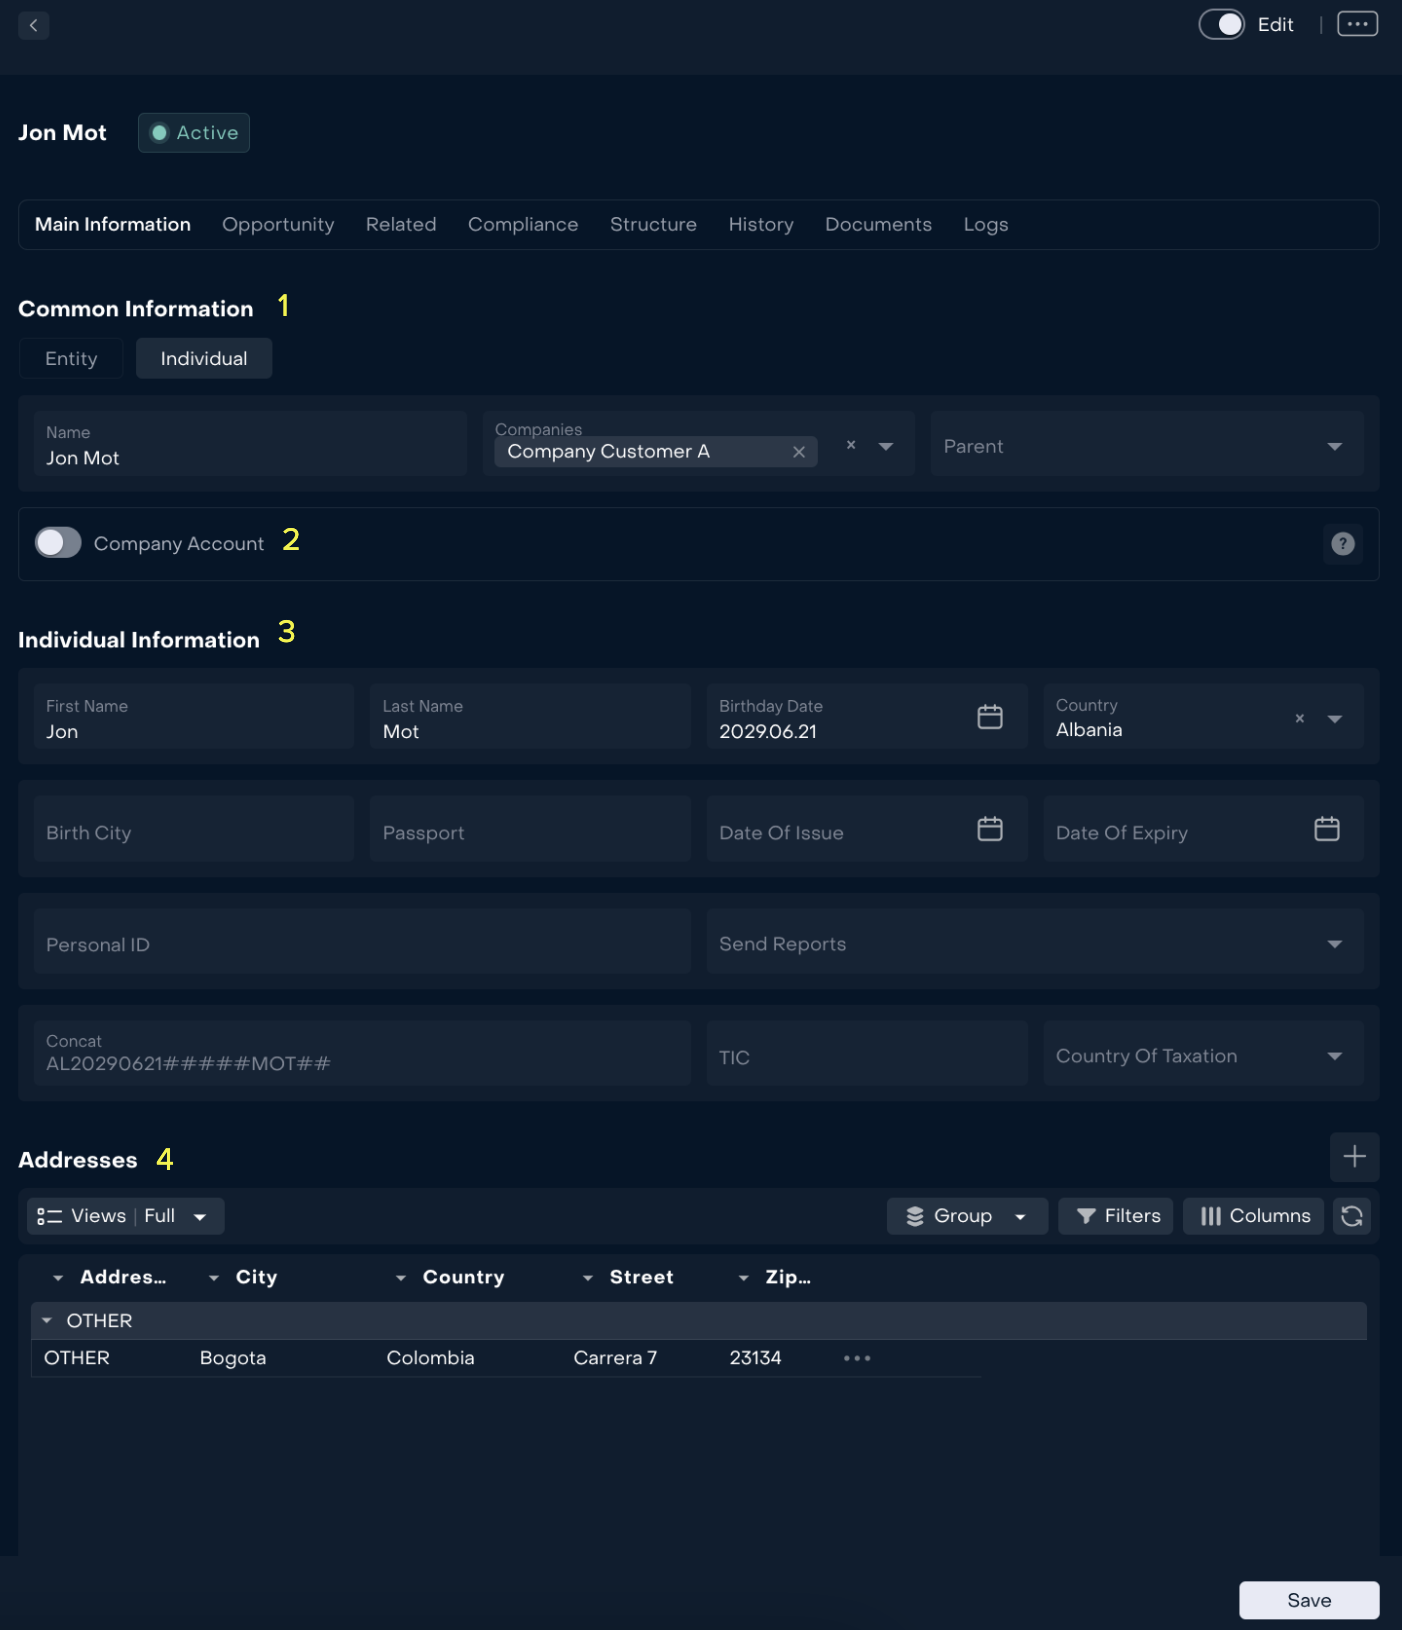
Go to Account and click on the "+" icon located on the right side.

Select “Individual” type of the account and fill in the information. Fields marked “*” are required.

# | Description |
|---|---|
1 | General information of the account. Select the type of account. Fill in the required fields. |
2 | Legal Entity (company account itself), can be created to form PROP or OMNIBUS portfolio. |
3 | Individual account information. Fill in the required fields. |
4 | Account address. |
Click Save if an Account is configured correct. You can make changes by clicking on the Edit switch.

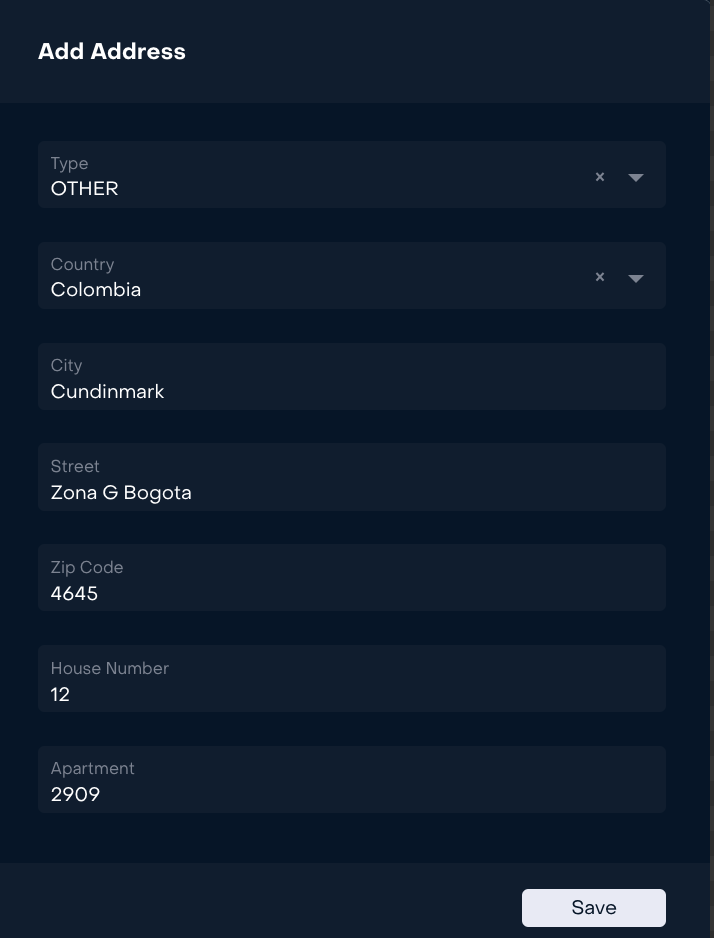
To fill in the address information, click "+" and fill in the required fields in the window that opens.
Click the "Save" button if the account is set up correctly.
How to create Entity Account
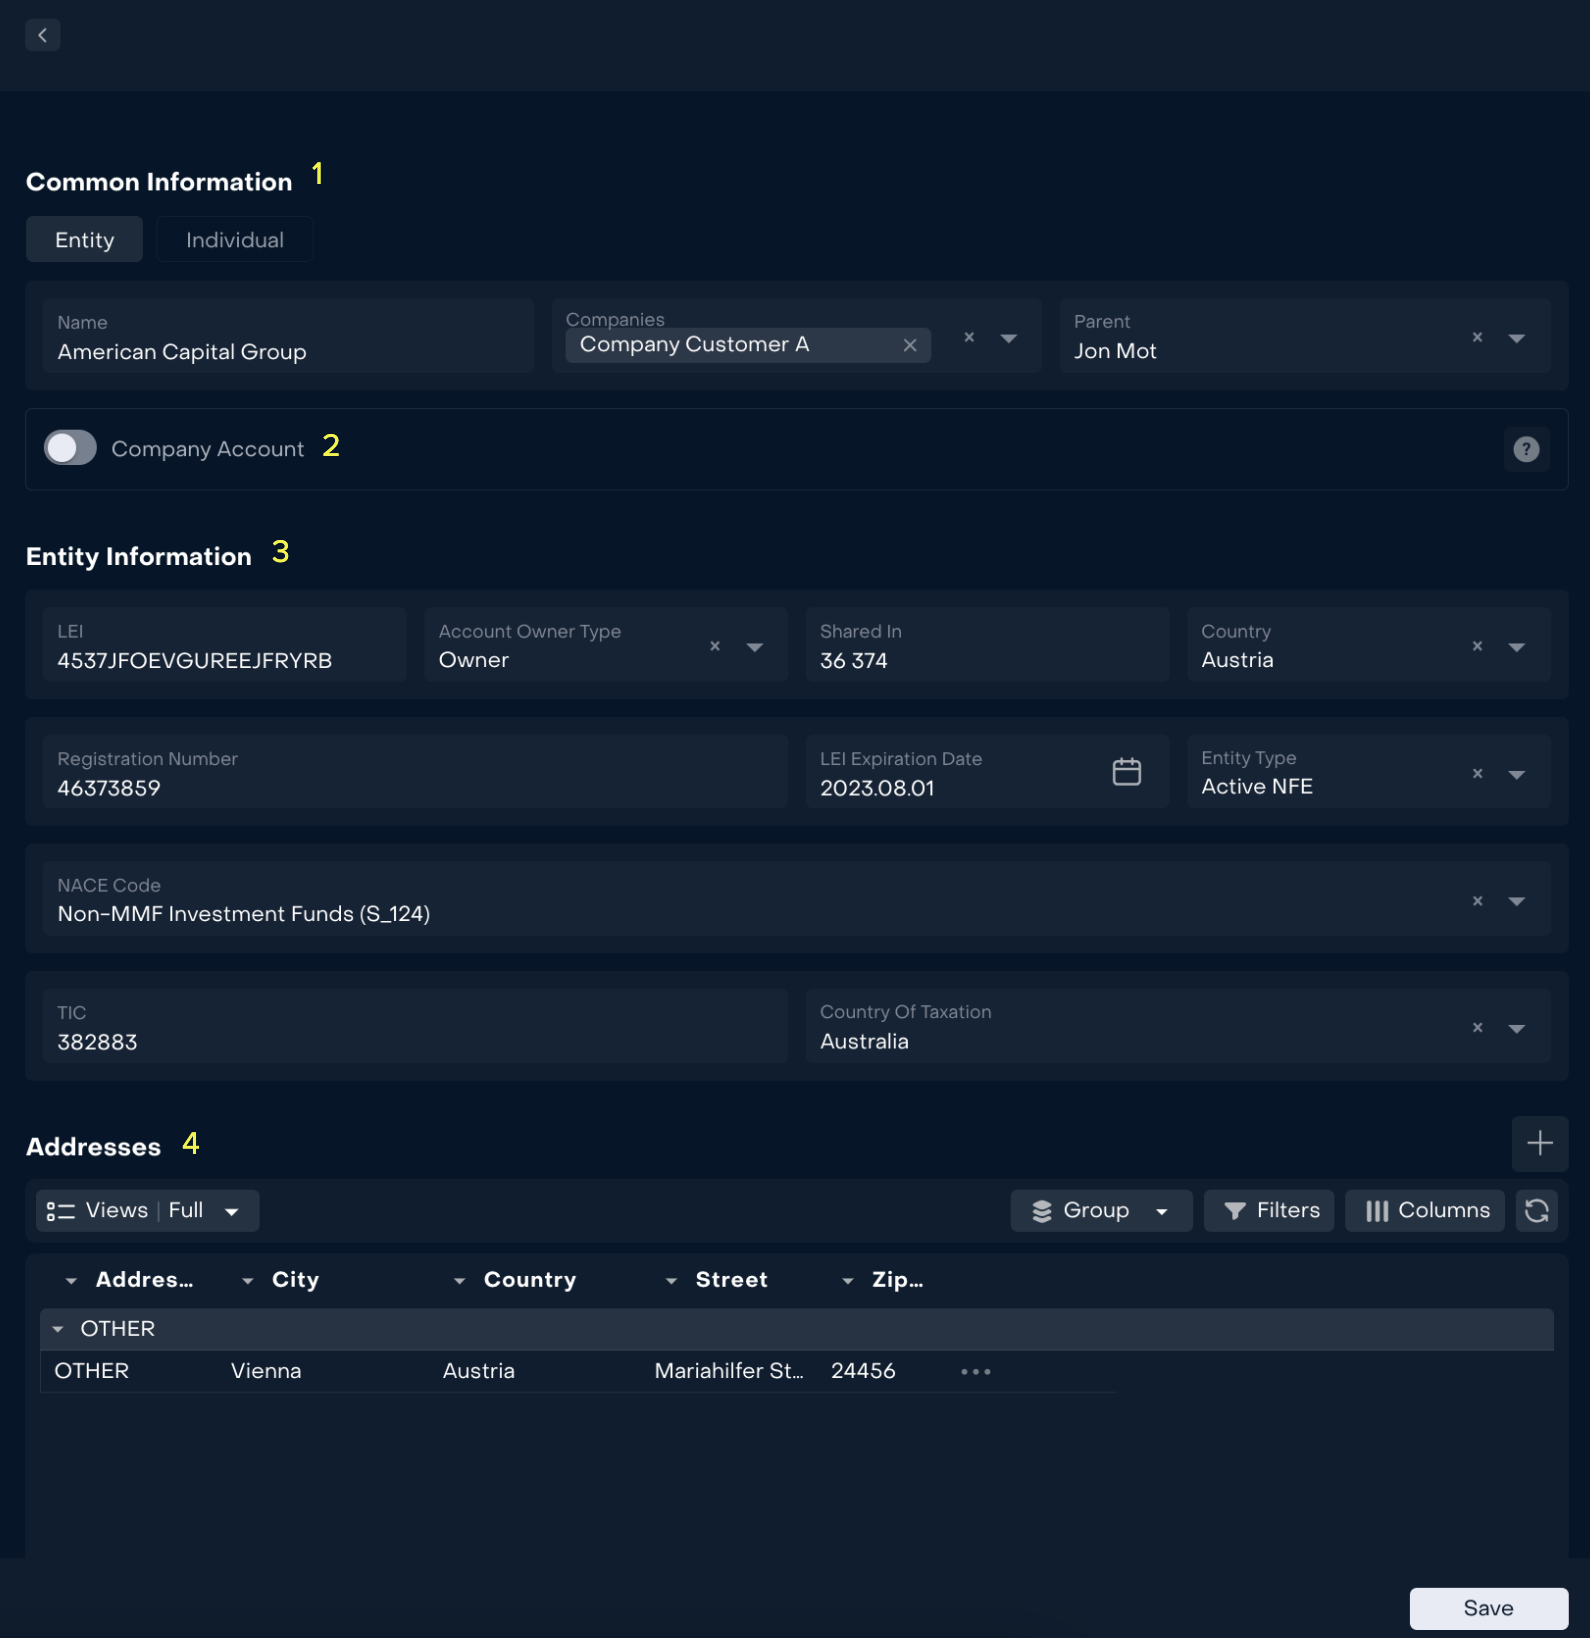
Please pay attention to the fact that Entity Account must be related to Individual Account in the hierarchy. It’s required to know the Beneficial owner of the legal entities.
To create Entity Account:
Go to Account and click on the "+" icon located on the right side.

Select “Entity” type of the account, select parent account and fill in the information. Fields marked “*” are required.

# | Description |
|---|---|
1 | General information of the account. Select the type of account. Fill in the required fields. |
2 | Legal Entity (company account itself), can be created to form PROP or OMNIBUS portfolio. |
3 | Individual account information. Fill in the required fields. The "LEI" code must contain 20 characters. |
4 | Account address. |
Click Save if a Account is configured correct. You can make changes by clicking on the Edit switch.

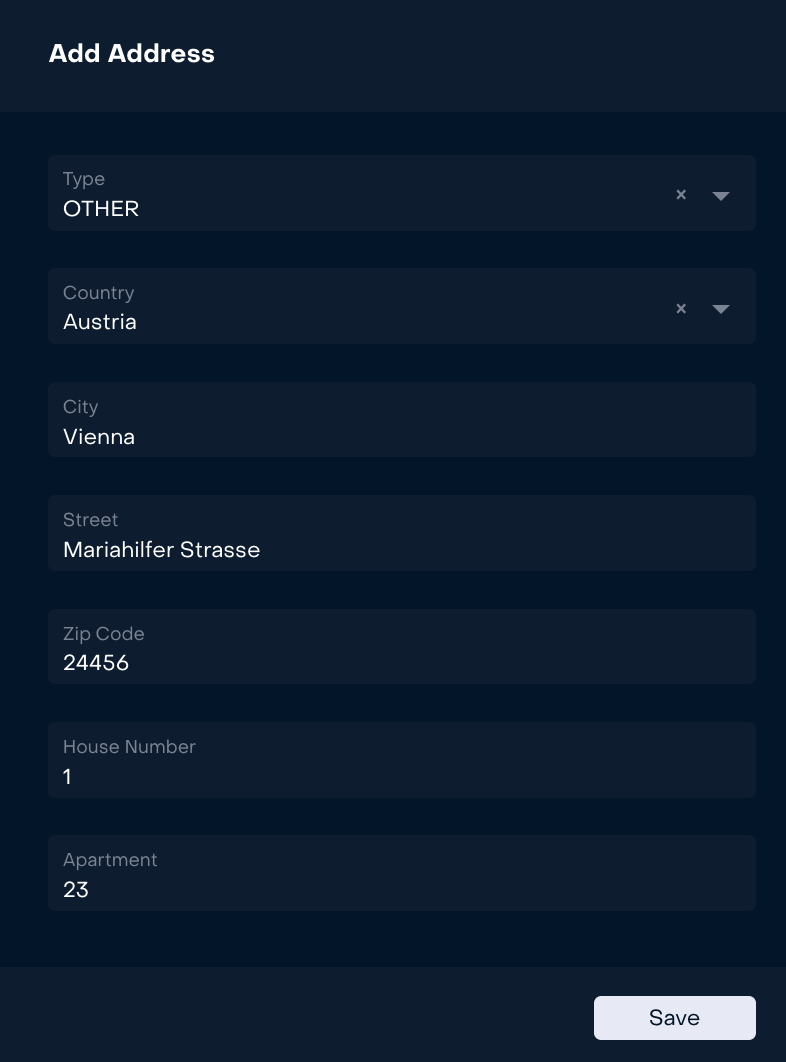
To fill in the address information, click "+" and fill in the required fields in the window that opens.
Click the "Save" button if the account is set up correctly.
