
How to set up Back Office Manager Profile and Role
There is a simple way to regulate a user’s action on objects and records. You can define permissions for users to give them full or restricted access to objects and records.
Here is a quick scenario on setting up Back Office Manager profile and role.
Define Profile Permissions for Back Office Manager
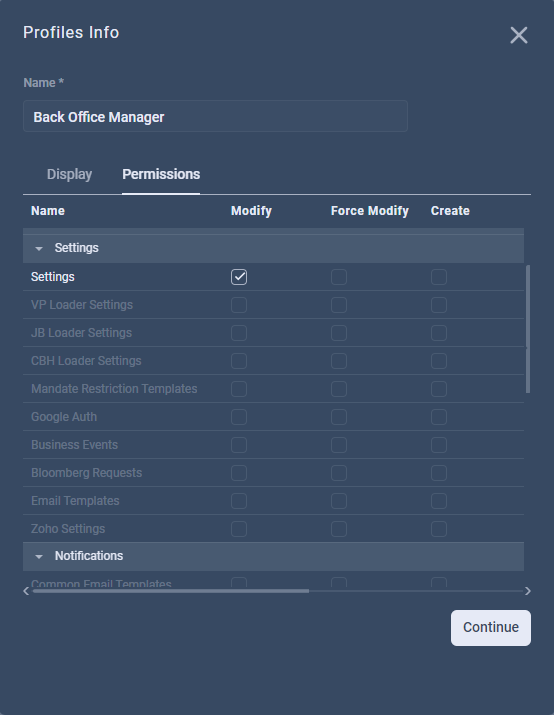
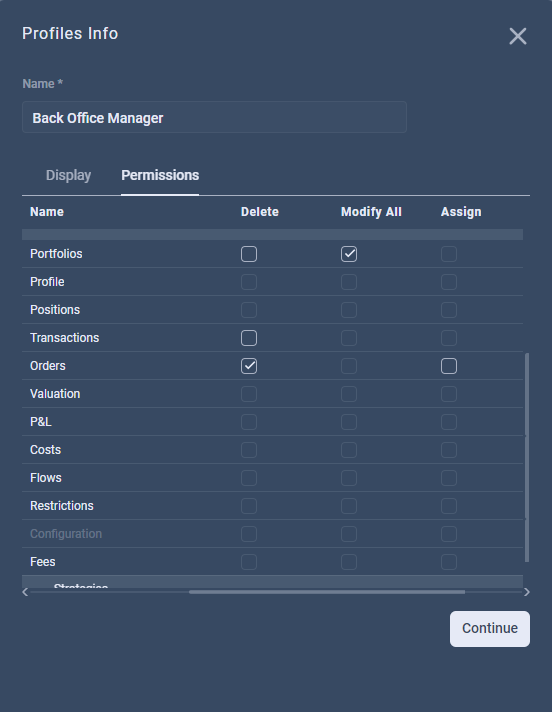
Skip to this section to learn about profile creation. When you open a Profile page, you see the Display and Permissions tabs with full list of objects and their permissions.
You can use the scroll bar to the right of the window to scroll through all objects, and you can collapse the display of objects you don't want to see by clicking the arrow next to the name of the object you want to minimize.
You can also use the scroll bar at the bottom of the window to scroll all permissions in the Permissions tab.
Choose following permissions for Back Office Manager.
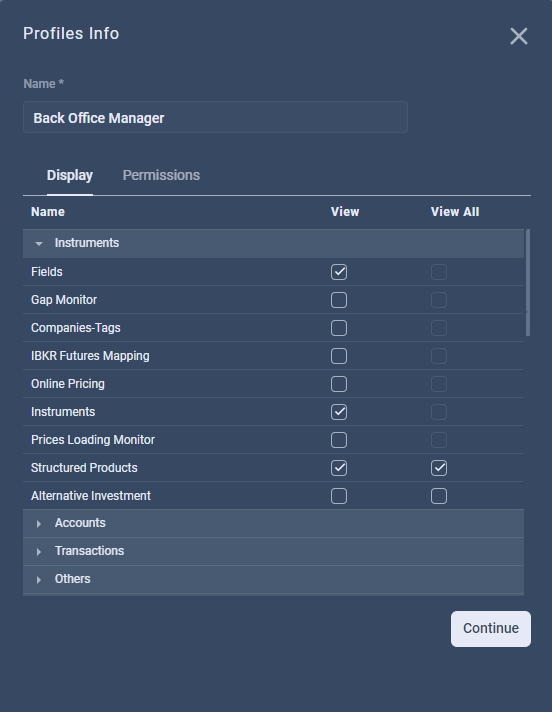
Instruments section
In the Display tab mark:
view check box for the Field object;
view check box for the Instruments object;
view and view all check boxes for the Structured Products object.
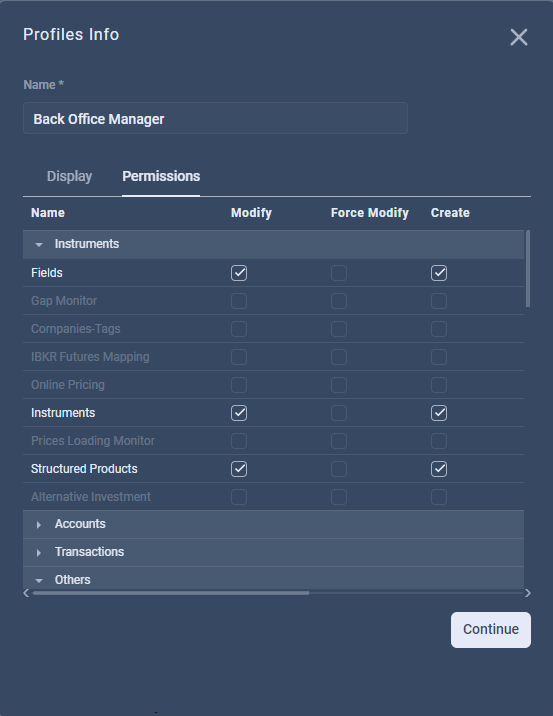
In the Permissions tab mark:
modify and create check boxes for the Field object;
modify and create check boxes for the Instruments object;
modify and create check boxes for the Structured Products object.
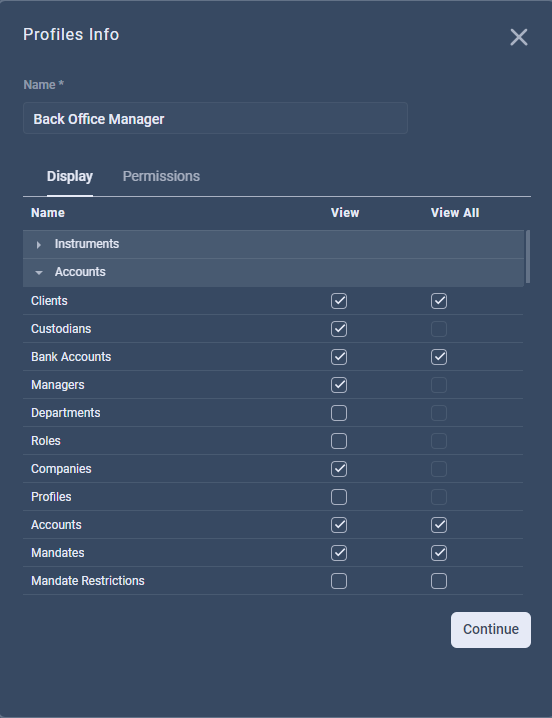
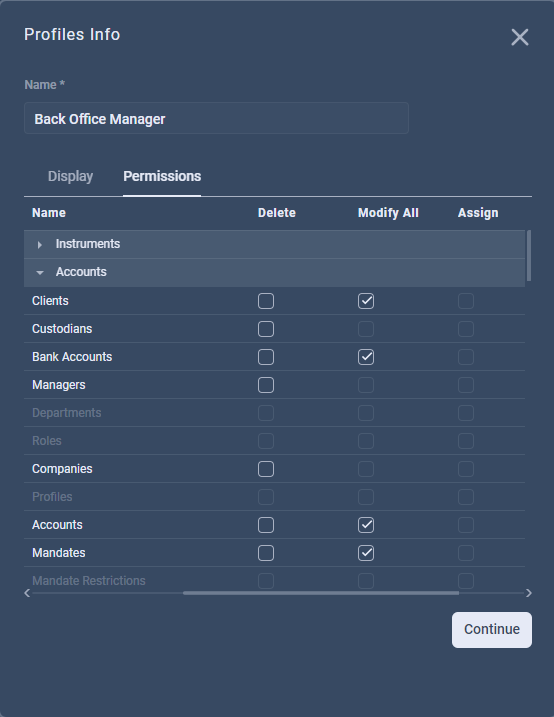
Accounts section
In the Display tab mark:
view and view all check boxes for the Clients object;
view check box for the Custodians object;
view and view all check boxes for the Bank Accounts object;
view check box for the Managers object;
view check box for the Companies object;
view and view all check boxes for the Accounts object;
view and view all check boxes for the Mandates object.
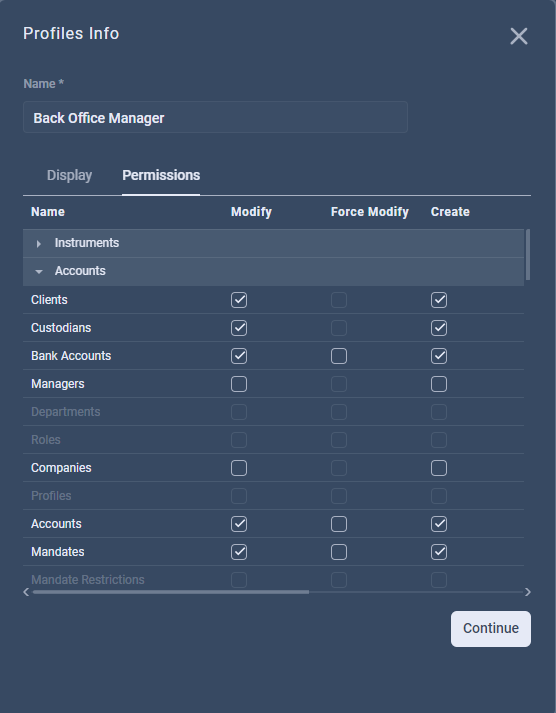
In the Permissions tab mark:
modify, create and modify all check boxes for the Clients object;
modify and create check boxes for the Custodians object;
modify, create and modify all check boxes for the Bank Accounts object;
modify, create and modify all check boxes for the Accounts object;
modify, create and modify all check boxes for the Mandates object.
Transactions section
In the Display tab mark:
view and view all check boxes for the Orders object;
view check box for the Transaction Loader object;
view and check box for the Matching object;
view check box for the Deactivated Transaction object;
view check box for the Transaction Without Bank object;
view and view all check boxes for the Fees object;
view check box for the Counterparty object;
view and view all check boxes for the Transactions object.
In the Permissions tab mark:
modify, create, delete and modify all check boxes for the Orders object;
modify check box for the Matching object;
modify and create check boxes for the Fees object;
modify and create check boxes for the Counterparty object;
modify, create and modify all check boxes for the Transactions object.
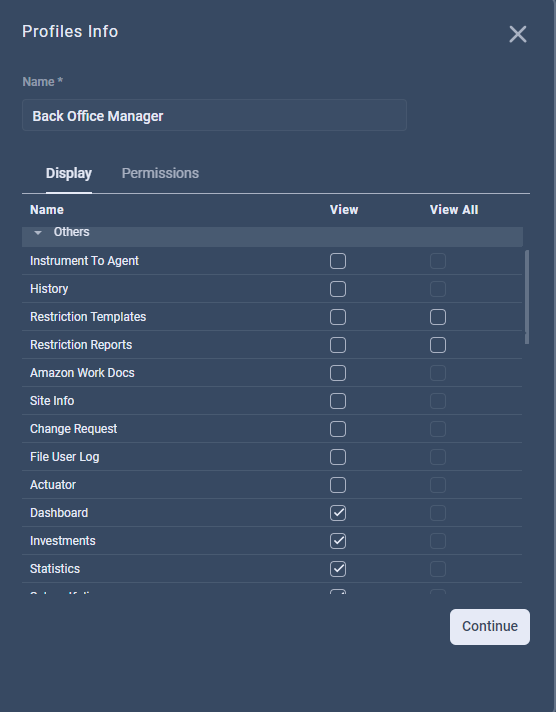
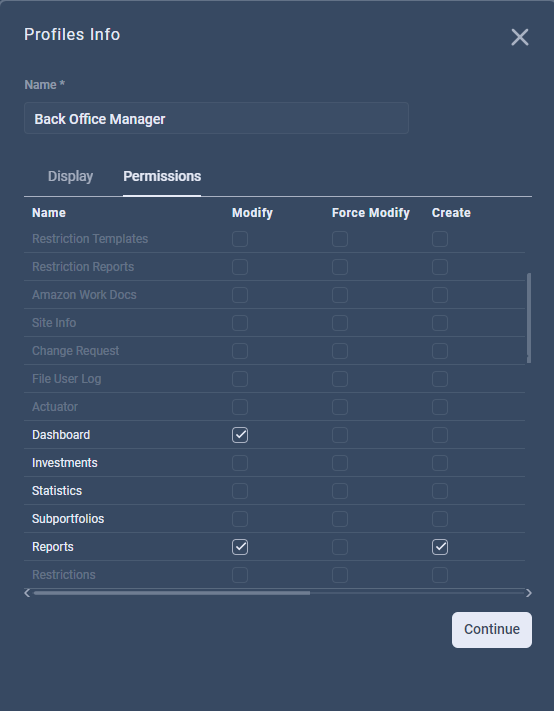
Others section
In the Display tab mark:
view check box for the Dashboard object;
view check box for the Investments object;
view check box for the Statistics object;
view check box for the Subportfolios object;
view check box for the Reports object.
In the Permissions tab mark:
modify check box for the Dashboard object;
modify and create check boxes for the Reports object.
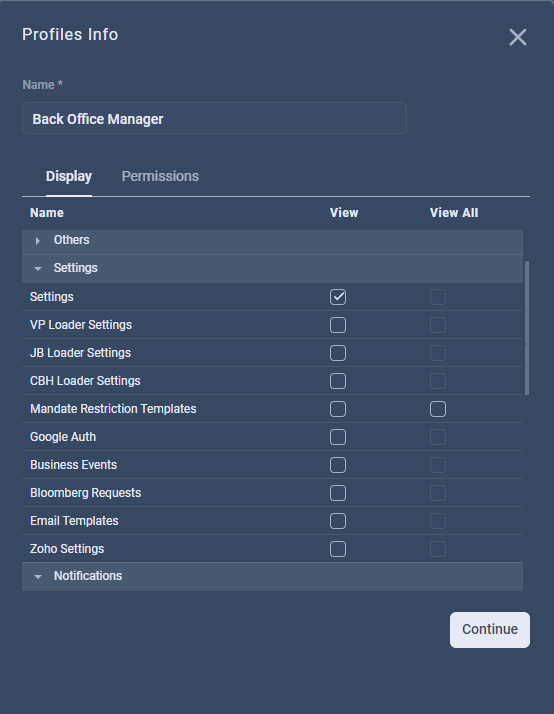
Settings section
In the Display tab mark:
view check box for the Settings object.
In the Permissions tab mark:
modify check box for the Settings object.
Positions section
In the Display tab mark:
view check box for the Positions object.
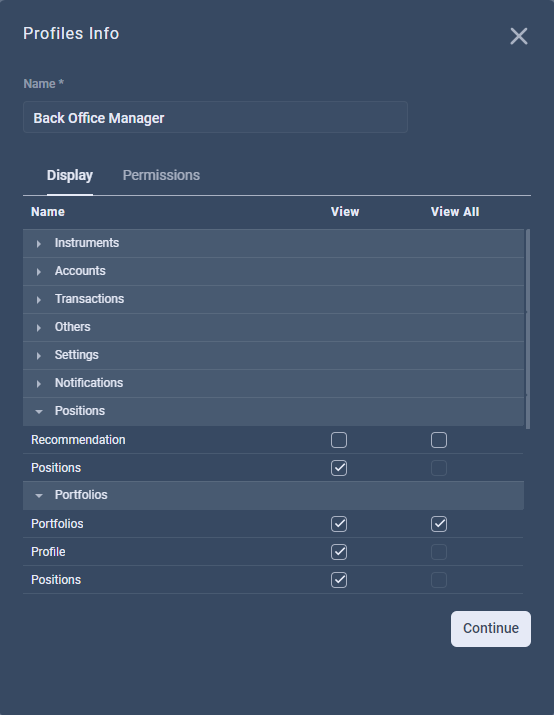
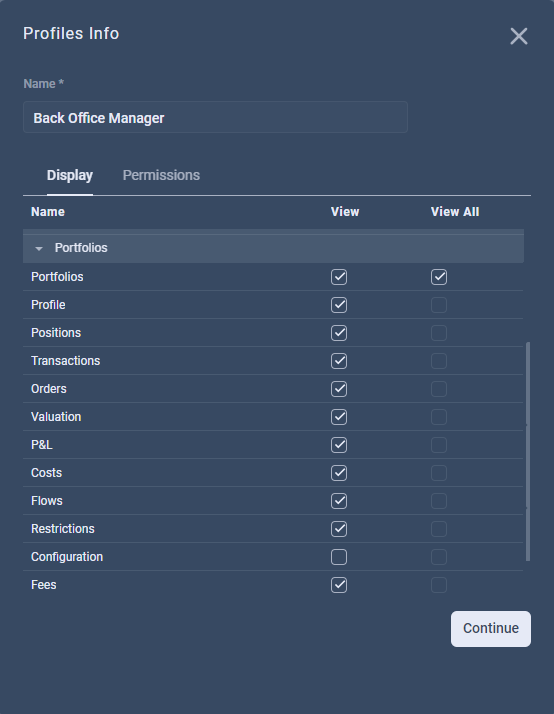
Portfolios section
In the Display tab mark:
view and view all check boxes for the Portfolios object;
view check box for the Profile object;
view and check box for the Positionsobject;
view check box for the Transactions object;
view check box for the Orders object;
view check box for the Valuation object;
view check box for the P&L object;
view check box for the Costs object;
view check box for the Flows object;
view check box for the Restrictions object;
view check box for the Fees object.
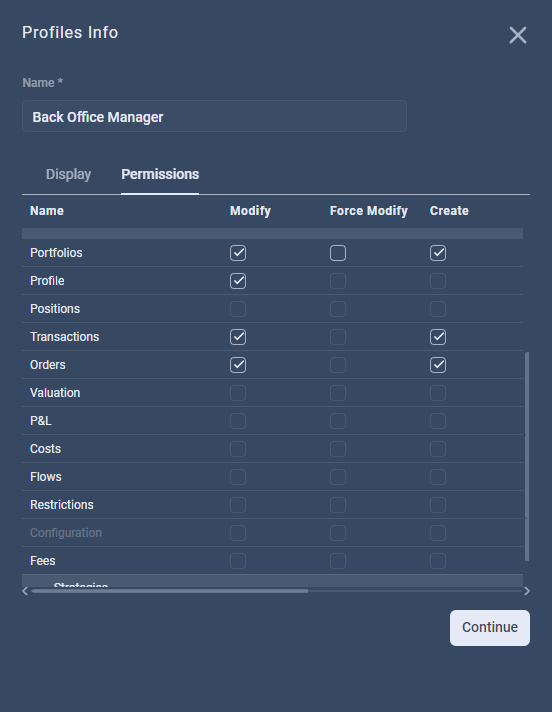
In the Permissions tab mark:
modify, create and modify all check boxes for the Portfolios object;
modify check box for the Profile object;
modify and create check boxes for the Transactions object;
modify, create and delete check boxes for the Orders object.
Do not forget to click Save after you make changes to profile permissions.
Set up Role for Back Office Manager
After setting up permissions you need to create the Back Office Manager role and assign it to the user.
Let us learn about the relationship of roles with users and profiles.
Every user has a role. A role have a profile assigned to it. If a profile has certain permission, then users who belong to the profile have that permission. For example, if a profile is given permission to edit or delete portfolios, then the users of the profile can edit or delete portfolios.
Skip to this section to learn about role creation. To create Back Office Manager role enter following details in the Role page:
Field name | Value |
|---|---|
Name | Back Office Manager |
Code | BO_MAN |
Parent | Back/Middle Office Head |
Status | Active |
Default Profile | Back Office Manager |
Decript Data | ✔ |
External Access | ✔ |
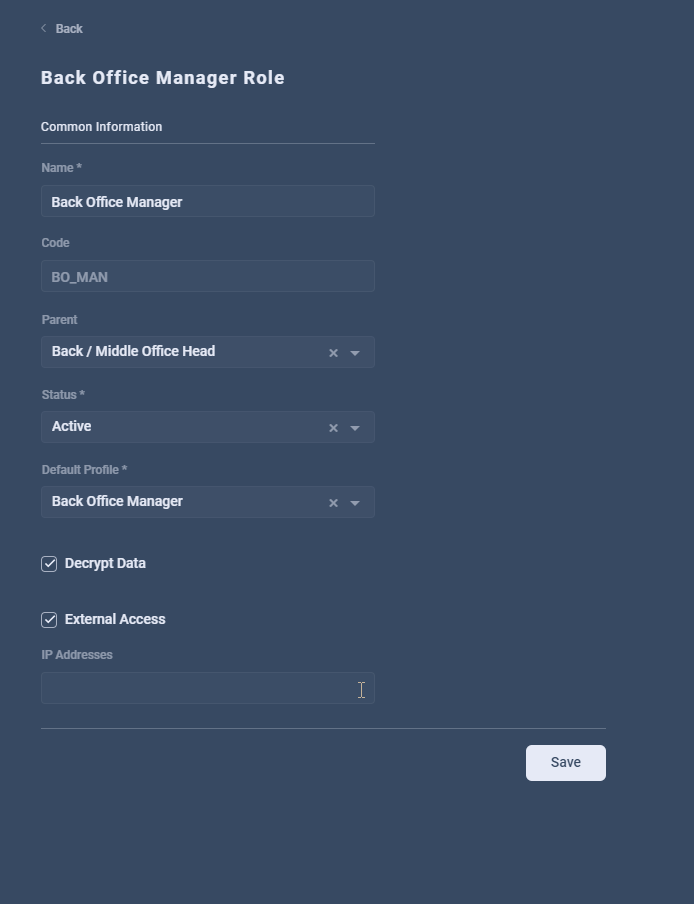
Do not forget to click Save after you make changes to the Role page.
Create Role Hierarchy
There is an example of the organization hierarchy. You can recreate it.
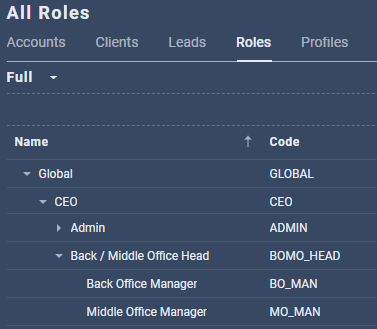
You can delete the existing roles and create a new one. However, you cannot delete the first role in the hierarchy. Skip to this section to learn how to delete a role.